MIUI ROM V2.0 for Samsung galaxy y gt-s5360

Samsung galaxy y gt-s5360 is one of best low ended device from Samsung, looking at its features we can say it is a good deal as compare to its price it includes most of the features the only thing it lacks is true GPU but still we can over come this by rooting this device and installing Chainfire 3d which helps to run most of the HD Games on Samsung galaxy y or Armv6 devices. Any ways lets get back to our main topic MIUI ROM V2.0 for Samsung galaxy y. It is a cool Rom for Samsung Galaxy y fast and stable this rom is developed by amal das member of Xda forum so thanks him if you like his work.  So before installing this Custom Rom first of all take a look on few screen shots of Samsung galaxy y running Miui Rom.


Warning:
If you follow these steps properly, you will successfully install the ROM or else you wont. It may leads to Bricking your Phone or other security issues. I will not be Responsible for what happens to your Phone. I personally tried this ROM. It worked fine for me.
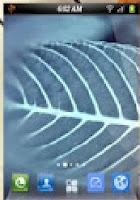
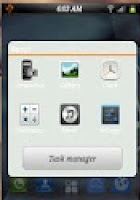

Screen shots:


Features:


  • Fast, Stable
  • Deodexed APKs; Reindexed
  • Zipaligned; Batch Optimized
  • Superuser Access; Busybox Support
  • Supports Dartktremor's A2sd; Init.d scripts
  • Compatible with V6 Supercharger
  • Quick Settings; 14 Toggles by lidroid rom
  • swype to remove notification
  • new status bar like MIUI rom's
  • QQlaucher as default
  • new file browser
  • new taskmanager
  • new messager
  • new dailer
  • new contacts
  • playstore
  • new deskclock
  • MIUI alaram,natification & UI sounds
  • new lock screen
  • new theme
  • MIUI music player and more stuffs from MIUI rom
Requirments:


  • WeUi V1.0.0.zip - Link (Required)
  • WeUI v2.0.zip - Link (Required)


Installation Instructions:


  • Backup your System using ClockworkMod - Link (Required)
  • Download both files from above link
  • Now copy both files to the root directory of your phone SD Card. Don't put it in any folder else it will not work..
  • Turn Off your Device and boot in Recovery Mode by Pressing and Holding this Key Combination (Volume Up + Home Button + Power Button).
  • Once you entered into the Recovery Mode. You will see the Blue Color User Interface where you can't use Touchscreen. Instead use "Volume Up and Volume Down to move Up and Down". And "Home Button to Select". And "Power Button used to go Back"
  • Once you entered into Recovery Mode select "Apply Update from SDCard" option and choose the rom file "WeUi V1.0.0.zip" it will start installing your device once the installation is over successful Reboot your Phone by select "Reboot System Now". booting may take a bit longer time then normal booting keep passions.
  • Now Reboot your phone again to Recovery Mode and Select the next file which is "WeUI v2.0.zip" let it be installed and reboot your device that is all.


The ROM is successfully installed in your phone. So Play with it.
Read more ...

Root samsung galaxy fit running on Android 2.3.6 gingerbread

Samsung galaxy fit is one of the best selling smartphone in the  series of entry level smartphone's from  Samsung that runs on Android Operating System . So here in this article i am going to write the procedure how to Root this Smartphone After rooting this device you can take full advantage because you gain Superuser privilege on your device, You can install custom ROM's, Software's that require superuser right Ant lots more.If you don't know what rooting is on Android Phone and its advantages and disadvantages read Here. If you want to know more about this package look at xda and thanks to dev.
As i told you before in this post that rooting is all about gaining administrator privilege on your android devices to perform some necessary functions that are locked by the manufacturer of the device when you buy this is done to protect your phone from getting damaged but if you are a tech expert then using your phone with guest privilege will be just like tea without sugar. So if you want to take full advantage of your device you can root your device decision is yours. So here is how to root your Samsung Galaxy fit running on Android 2.3.6. Don't try this on other Device or version .Using on other device may lead to unaccepted results.
Root samsung galaxy fit running on Android 2.3.6 gingerbread RootingPalace.tk

Warning:

Use this instruction only with Samsung Galaxy fit. Rooting will void your device Warranty. 
Do it at your own risk we will not be held responsible for whatever happen to your phone. It is provided only for instructional and educational purposes.


Requirements:

  • Sumsung galaxy fit GT-S5670 running on Android 2.3.6 Gingerbread.
  • Rooting file "Galaxy_FIT_Rooting.zip " Download from HERE or here

Rooting Instructions:

  • First of all you will have to Download "Galaxy_FIT_Rooting.zip " from the link provided in Requirements section of this post and place it in the root Directory of the SD Card and not in any folder other wise it will not work.
  • After placing the file turn off your phone
  • Now reboot your phone in recovery mode by pressing and holding volume up + home + power button together.
  • Now you are in recovery mode touch screen will become function less in recovery mode so use volume up and down key to move up and down, home key for making selection and power button for back.
  • Now select the option saying update from sd card or something similar to it and navigate to the location where you placed the rom file "Galaxy_FIT_Rooting.zip " and select it.
  • It will take few minutes to complete the process whe it is completed reboot your phone.
  • In the apps drawer you will find a new app called Superuser it means that your phone has been rooted.
Congratulation! now you can take full advantage of your device like installing custom ROM's on your device, etc.
Read more ...

MiniS3 v2 Rom For Samsung Galaxy Mini or Pop GT-S5570 an Armv6 Device

Recently Samsung Galaxy S III which has really beautiful user interface but now we can enjoy the look and feel of galaxy s3 on our low ended Armv6 mobile samsung galaxy mini or pop gt-s5570. It was developed by safariking and now we can have Experience of S3 on our galaxy mini / pop for more details on this project visit Developers Site .There are different rom available with S III interface for Samsung Galaxy Mini, Galaxy Gio, Galaxy Ace, Galaxy Fit , Galaxy SII and other similar devices. But here we are dealing only with Galaxy S5570. In short this Rom is modification of Cyanogenmod 9 rom which includes TouchWiz 5 launcher along with some features from galaxy s3 to have the same user experience that are included in galaxy S3. This it a beautiful user interface rom and it is smooth and fast the most i liked about the rom has is its ics look and its transition effects on home screen or luncher. It has some bugs but it still works fine. So lets take look on few screen shots running MiniS3 Rom on galaxy mini / pop.


Screen Shots:


For more Screen Shot click Here.

Change Logs:
Change Logs in MiniS3 V2 as compare to MiniS3 V1
  • Updated to the newest ICS/CM9
  • Upadted SSugest
  • Updated Flipboard
  • Theme pre-installed
  • Launcher pre-installed
Warnings:
This rom is only meant only for Samsung Galaxy Mini / pop S5570 and not for other devices using with other device may lead brick your device. Do it at your own risk we will not be held responsible for whatever happen to your phone. It is provided only for instructional and educational purposes.

Requirement:
 MiniS3 v2 Rom Download from here

Installation Instructions:
  • First of all make backup of your Device and charge the battery.
  • Before installing this rom on galaxy mini/pop remember it should be running on latest version of Android gingerbread OS and clockwork mod custom recovery ( it is mandatory else don't use it)
  • Download the rom file "MiniSIII V2.zip " from the link provided above and copy it to the root directory of your sd-card not inside any folder and turn off your phone.
  • Reboot your Galaxy mini / pop to recovery mode by pressing Home + Power button at the same time.
  • When your device boots in recovery mode you will see the Blue Color User Interface where you can't use Touchscreen. Instead use "Volume Up and Volume Down to move Up and Down". And "Home Button to Select". And "Power Button used to go Back" 
  • From the menu that appears select "Apply Update from SDCard" option.
  • Now select the rom file MiniSIII V2.zip for installation that you placed in the root directory of your sd card once the process is over reboot your device that is all.
NOTE: 
If you face any error while updating repeat the process above again.
 Congratulation you have installed the latest miniS3 v2 rom on your Galaxy mini/pop that provide you with glaxy s3 experience on you Device.
Read more ...

CyanongeMod 7.2 Rom for Galaxy Mini / Pop S5570

CyanongeMod 7.2 Rom for Galaxy Mini / Pop S5570 has been released finally by CyanongeMod team. As this is verified stable and release by CyanongeMod team so we can say that will be smooth and stable. As this rom has been been released by the team so you can give a try and in any case if you an error you are free to report about the bugs to the team by visiting this link, so the team can fix the error when next version released by them.
So here is how to install this new CyanogenMod 7.2 stable Custom Rom released by the team on galaxy mini /pop.


Warning:
Use this instruction only with Samsung Galaxy Mini / Pop, model number GT- S5570 not for other devices
Do it at your own risk we will not be held responsible for whatever happen to your phone.It is provided only for instructional and educational purposes.


Changelog :

  1. Fixed all known issues
  2. Stable and smooth performance.
  3. Rom Details :

  • Device Name : tass (Samsung GalaxyMini) 
  • Release Type : Stable 
  • Release Name : cm-7.2.0-tass.zip 
  • Release Date : 2012-06-16 04:46:10 
  • Size : 85.21 MB md5sum: 73d0176413ae02d22ae0e2252c35bb5e 
  • Download Link : Tass Rom.zip
Installation Instructions: 
  • First of all make backup of your Device.
  • Before installing this rom on galaxy mini/pop remember it should be running on latest version of Android gingerbread OS and clockwork mod custom recovery ( it is mandatory if not done do it first link will be provided soon how to update this device to Gingerbread and how to install CWM)
  • Download the rom file "cm-7.2.0-tass.zip" from the link provided above and copy it to the root directory of your sd-card not inside any folder and turn off your phone.
  • Now reboot your Galaxy mini to recovery mode by pressing Home + Power button together.
  • Your galaxy mini /pop will boot into Recovery Mode. You will see the Blue Color User Interface where you can't use Touchscreen. Instead use "Volume Up and Volume Down to move Up and Down". And "Home Button to Select". And "Power Button used to go Back" 
  • Select "Apply Update from SDCard" option from the menu.
  • Now select the rom file that you placed in the root directory of your sd card "cm-7.2.0-tass.zip". and let the process be completed and reboot it.
 Congratulation you have installed the laatest version of CyanongeMod 7.2 on your Galaxy mini/pop.

Extra latest Google Apps:

   You can also install latest google apps download from here process will be same as above it will too be installed in recovery mode. After installation do wipe Data .

Do leave comment if you have any Suggestion or Question.
Read more ...

Root Samsung Galaxy S2 GT-I9100 running Android 4.0.3 ICS

Rooting an android device in past was not an easy task you have heard that many guys use to brick their phones while trying to root or unlock it, but as the time passed now it is really becoming easy to root an android devices. It has become possible because of hard work of developers who are always trying to create better, easier, stable and faster methods of rooting an android devices, so now even a newbies can also root their devices and can gain superuser rights on their devices.
So here is how to root Samsung Galaxy S2 GT-I9100 running Android 4.0.3 ICS ( XWLPG firmware ). To root Galaxy S2 you will need a pc running windows, necessary Drivers, Odin, XDA Developer Chainfire’s CF-Root Kernel and few minutes of your valuable time. 


Warning:
Use this instruction only with Samsung Galaxy S2, model number GT-I9100 not for other devices
Do it at your own risk we will not be held responsible for whatever happen to your phone.It is provided only for instructional and educational purposes.

Root Samsung Galaxy S2 GT-I9100 running Android 4.0.3 ICS by www.rootingpalace.tk

Requirements

  • Samsung Galaxy S2 running on Android 4.0 ICS (XWLPG firmware). If not update it first to required version.
  • Backup all your important data from your phone.
  • Enable USB debugging on your Galaxy S2 
  • A pc running on windows and loaded with proper required driver. You can get this driver if you have kies cd that is provided with your device else you can download it from device manufacturar site or from here 32-bit (x86) Windows | 64-bit (x64) Windows and install it before proceeding.
  • You will need Odin 1.85 (Odin 1.85.zip ) and CF-Root Kernel (CF-Root-SGS2_XW_NEE_LPG-v5.5-CWM5.zip) download it on your pc and keep it safe.
Instructions
  1. As you have already downloaded both the files Odin 1.85.zip and CF-Root-SGS2_XW_NEE_LPG-v5.5-CWM5.zip keep both in a folder then extract each of then on extracting CF-Root-SGS2_XW_NEE_LPG-v5.5-CWM5.zip you will have CF-Root-SGS2_XW_NEE_LPG-v5.5-CWM5.tar and on extracting Odin 1.85.zip you will have Odin3 v.1.85.exe (use win-zip or win-rar for extracting purpose) 
  2. Now Turn off your Samsung Galaxy S2. 
  3. Reboot your Samsung Galaxy S2 in Download Mode. to enter download mode press and hold Volume Down, Home, and Power key together. You will get a warning massage saying. Press Volume Up to continue to enter Download Mode press volume up. 
  4. Now on PC lunch Odin3 v.1.85.exe by double clicking it and it will lunch Odin3. 
  5. In Odin3, click the PDA button and navigate to to the location where you have extracted CF-Root-SGS2_XW_NEE_LPG-v5.5-CWM5.tar file and select it. 
  6. Rest odin setting mast remain same. 
  7. Now connect your Samsung galaxy S2 with you will revive a message on lower left message box of Odin3 window Saying "Added" which means now your phone is connected wit your PC. If you did not revive any message disconnect your phone from PC and re-install the drivers on PC again.. 
  8. If your phone got connected successfully hit start button on Odin3 to begin flashing the CF-Root Kernel to your device. 
  9. When flashing is complete successfully, your Samsung Galaxy S2 should automatically reboot. Disconnect your phone when Samsung logo appears on your phone screen. In case an error occur disconnect your phone from PC remove battery and then re-install it and begin to repeat again from step 4 of instruction section.
Congratulation! and enjoy full power of android 4.0 ice cream sandwich on your Samsung galaxy S2
Read more ...

Unrooting samsung galaxy y s5360

Unroot your samsung galaxy y s5360. If you have root the your Phone before and now you want to unroot it then you will have to follow the instructions provided below. unrooting helps to recover the warranty that you have void while rooting your device this is only for Samsung galaxy y gt-s5360 and not for other phone.


Instruction to Unroot Samsung galaxy y gt-s5360
  • Download the unroot-update.zip file here 
  • Copy the downloaded file unroot-update.zip file into the root directory of your phone's SD Card
  • Switch off your device and restart it into recovery mode by pressing Volume UP + Home Button + Power Button together
  • You will find your phone in recovery mode touchscreen cannot be used when phone is in recovery mode for making selections and movements, you have to make use of volume up/down keys and make the selection by pressing home key.
  • In the recovery mode menu, there is an option 'apply update from sdcard' Select it.
  • Choose the pasted unroot-update.zip and click on "yes".
  • After the patching of that file, you will be back to the menu, and there it's written "reboot system now". Select it.

After the reboot, go to phone's main menu and if you are able to find the "SuperUser" App on it, but once you click it you will notice that it doesn't work anymore.
Read more ...

Root Samsung Galaxy mini Gt-S5570 running Android 2.2.1 and 2.3.4

Samsung galaxy mini is one of the best low ended device powered with android os. when it was lunched for the first time it runs Android 2.2 Froyo but as the time passed it was upgraded to android 2.3 gingerbread. So here we are going to cover rooting both whether your device is running on Froyo or Gingerbread.So to gain superuser right on this device you will have to root it. Want to know what rooting read here

Steps to Root Samsung Galaxy mini Gt-S5570 running Android 2.2.1 Froyo

   So first lets start with the Samsung galaxy mini Running on Android 2.2 Froyo, to root this device first of all you will need Kies that you can get from the manufacturer web site Samsung.com it is required for necessary drivers the next thing that you will required is Super One Click 2.3.3. zip


Installation Instructions:
  • Install Samsung Kies on your pc running windows for required drivers.
  • Enable USB debugging on your phone from Menu go to Settings > >Manage Applications > >Development > >USB debugging check it.
  • Connect Gt-S5570 running Android 2.2.1 Froyo  to pc via usb cable.
  • Extract super one click.zip and run SuperOneClick.exe
  • Click on "Root"and wait for rooting process to be finished.
  • Reboot phone
You have rooted your Samsung galaxy mini gt-s5570 running Android 2.2.1 successfully. Congratulation's

Steps to Root Samsung Galaxy mini Gt-S5570 running Android 2.3.4 Gingerbread

Gingerbread is another great android operating system successor of Froyo and samsung galaxy mini is capable of running this firmware too so to get more from this os we can root it. Remember that rooting your Device voids warranty and may brick your phone. 
Follow the steps below correctly and everything will go fine.

  • Download the update zip file from here 
  • Place the downloaded file in root directory of your Sd card {not in any folder}turn off your phone
  • Reboot your Samsung smart phone in recovery mode by pressing Press Home + Power Button together.
  •  Now you will be in recovery mode touch screen will not work use volume up and down to move and  home key to select
  • Select Apply update form sdcard’ and choose the file that you downloaded from your sdcard and ok let the process complete.
  • Reboot your device.
You have rooted your Samsung galaxy mini gt-s5570 running Android 2.3.4 successfully. Congratulation's
For any request or suggestion leave comment below
Read more ...

Beauty Sense ROM for Samsung Galaxy Y with HTC UI

Beauty Sense ROM for Samsung Galaxy Y which is pre loaded with HTC Sense UI (HTC THEMED) . Hi in past we have written few nice tutorial on how to install a custom rom on samsung galaxy y and was appreciated by the users so lets move to next step. So your question will be why to install this rom if there are so many custom rom available for galaxy y? The answer is if you love the user interface of Htc then this custom rom is for your's galaxy y. As because by default samsung devices are equipped with Touch wiz User Interface so by installing this custom rom on your galaxy y s5360 you will get htc sense user interface on galaxy y. Here i am just witting this tutorial .Special thanks to the creator of this rom "amal das" who made it possible for all of us to enjoy htc ui on galaxy y.


Features included in this rom:
  • Stable, Fast, Rock Solid
  • HTC styled 14 toggles
  • Various Buid.prop Tweaks
  • Deodexed
  • Zipalign
  • Rooted
  • BusyBox
  • Bash Shell Support
  • BusyBox run-parts support
  • Comes with Stock-like Kernel with init.d support
  • Full Support for Init.d scripts
  • Compatible with Merruk's Kernels
  • Superuser Access; Busybox Support
  • ICS keyboard
  • Asop lock screen ( default )
  • HTC styled settings
  • HTC styled dialer
  • HTC styled caller bg+ img
  • HTC styled laucher
  • Beats themed music player
  • Bass/Treble Enhanced Sound
  • 14 Toggles by lidroid rom
  • Swipe to Remove Implementation
  • New Google Play Store; Google Search Updates
  • Full Bravia Engine Port; Fix Xloud; Beats Integration
  • UI optimized; New Lockscreen by lockbot
  • Addon Important Apps (see more inside!)
Waring: If you follow the steps properly the Rom will be installed successfully and your phone will run smoothly but if not followed the instruction properly it may lead to brick your phone or other security issues. I'm not Responsible for what happens on your phone.


So first of all take a look at the screen shots:


Download:
zBeautySense v1.0 .zip

Installation Instructions:

  • First of all backup your phone 
  • Then download Beauty Sense v1.0 from the link provided in download section of this post
  • Then copy the downloaded file "zBeautySense v1.0 .zip" to the SD Card. place in root directory of your sd cart and not inside any folder else it will not work.
  • Turn Off your Device and go to Recovery Mode By Pressing Volume Up + Home Button + Power Button together. 
  • The phone will boot into Recovery Mode. You will see the Blue Color User Interface where you can't use Touchscreen. Instead use "Volume Up and Volume Down to move Up and Down". And "Home Button to Select". And "Power Button used to go Back"
  • Once you entered into Recovery Mode. You must Wipe your Phone to make this ROM Work Properly.
  • Then select "Apply Update from SDCard" option and choose downloaded Beauty Sense ROM which is "zBeautySense v1.0 .zip".
  • It will take some time wait until Patching was successful completed. Once patching is over select "Reboot System Now" from the menu. Booting may take longer time ten normal booting keep passions.
Now enjoy the taste of htc sense on galaxy y. Do not forget to thanks dev amal das at xda 
Read more ...

Minisense v 4 - Custom Rom For Samsung Galaxy Mini GT-S5570 with HTC UI

Samsung Galaxy Mini GT-S5570 is one of the best handset in the category of low ended devices that runs on Android os. So development of apps, Rom's, etc. for this device is going on rapidly. Recently a new custom Rom for this device has been lunched by the developer of  Minisense custom rom for galaxy mini s5570 smartphone, Goutamniwas It has many updated features then its previous version with htc sense UI and also  working wifi fix is also available.
This is not all, there are more features, enhancements and tweaks added to improve overall look and feel of devices that will run on Minisense v 4. Features included in the version 4 from developer's thread.

Screen Shot:
               More screenshot here

Change log Minisense v 4
  • Upgraded to sense 4.0 User interface
  • Squadzones kernel
  • Htc-keyboard included
  • Base completely updated to latest sources and latest new features
  • Droid wall(firewall for android)
  • Now you can install apps on sd card by using settings (go to:settings->cyanogenmod settings->applications->install location and then select externel , dont install any a2sd scripts)
  • Rom is very smooth and performing like never before
  • Scripts updated and modded
  • Many tweaks included for better performance, battery backup and hardware acceleration.
  • Above all the Rom preformance is smooth
Rom Details :
Disclaimer : 
Do It At Your Own Risk!

Installation Instructions :
  • Backup your phone necessary
  • To install this Rom you device must be running on Gingerbread OS or else update it first to Gingerbread using Odin Multidownloader v4.38
  • Download Minisense v4 ROM  from above.
  • Copy downloaded file to the root directory of your sd-card.
  • Turn off your device and Press Home + Power Button together.The phone will boot into Recovery Mode. You will see the Blue Color User Interface where you can't use Touchscreen. Instead use "Volume Up and Volume Down to move Up and Down". And "Home Button to Select". And "Power Button used to go Back"
  • Once you entered into Recovery Mode. You must Wipe your Phone to make this ROM Work Properly.
  • Then select "Apply Update from SDCard" option and select Minisense v 4 which is "Minisense v 4.zip".
  • It will take some time wait until Patching was successful completed. Once patching is over select "Reboot System Now" from the menu. Booting may take longer then normal booting time keep passions.
Next fix Wifi
     Download Working wifi fix from above. Place it on  root directory of sd card reboot in recovery mode update from sd card and select "minisense v4 workin wifi fix.zip" let it be installed and reboot.It will fix wifi error
           That's all you have successfully installed latest version of Minisense ROM  v4 on your Galaxy Mini gt-s5570 smartphone. Enjoy the HTC sense 4.0 user interface on your Samsung  smartphone. special thanks to Goutamniwas  from xda for this Rom.
Read more ...

Root Samsung Galaxy Nexus

The Samsung Galaxy Nexus is one of the best smartphones currently running Android version 4 ice cream sandwich. But it was not an easy task to gain superuser right on this device. But now it is possible to gain root access or superuser right on this device with help of a tool kit known as  Wug’s Galaxy Nexus Root Toolkit. The current version of this tool kit is 1.4. The toolkit has all the required file rooting and unrooting your device, you can also backup your data with the help of this tool kit. But before rooting your nexus you will have to unlock the Bootloader Instruction for ulocking Bootloader is provided here.


Warnings:
Use this on your own risk i will not be held responsible for what ever happens to your device. the information here is only provided for instructional and educational purpose.


Screenshot of tool kit:

Root Samsung Galaxy Nexus
Root Samsung Galaxy Nexus screenshot

Instructions and Download:
  • Download the toolkit from Dev link page and read full instruction there: Wug’s Galaxy Nexus Root Toolkit 
  • Install it to a top directory on pc
  • Launches it and select your device model 
  • Configure your drivers.
  • Backup your data >> Unlock >> Root >> done!
Read more ...

Root Samsung Galaxy Y s5360

What is Rooting? Rooting is the process in which the limitations are removed and full-access is allowed. Once rooted, the Android phone owner will have more control over many settings, features and performance of their phone. Basically, rooting means to get to the root of the operating system and to have the ability to make global changes.

Why Should You Root Samsung Galaxy Y?
Rooting your Android phone does afford you numerous benefits, including:-

Running special applications-Superuser is an app that can only be run on a rooted Android phone. This allows you to control which apps have access to the root system.

Freeing up memory-When you install an app on your phone, it is stored on the phone's memory. Rooting allows you to move installed applications to your SD card, thus freeing up system memory for additional files or apps.

Custom ROM's-This is the most powerful feature of rooted phones. There are hundreds of custom ROM's that can do anything from speeding up the processing speed of your phone to changing the entire look and feel of your phone.
4.Play HD & 3D games on your Galaxy Y with the help of Chain fire 3D.
Why Should You Not Root Samsung Galaxy Y? There are not many reasons for you not to root Samsung Galaxy Y except the fact that your device’s warranty gets void. Usually all manufacturers provide a warranty of one year for the devices and they do not allow one to root the device and access system files. However, Android is an open source OS and hence there exists rooting! Also, you can unroot Samsung Galaxy Y later in case you wish to make use of your device’s warranty.

Steps to Root Samsung Galaxy Y s5360 
1. Download Update.zip
2. Copy the downloaded file to the root of your SD Card via USB Cable or any other method according to your convenience.
3. Turn of your Samsung Galaxy Y
4. Reboot into recover mode by pressing Home button + Volume up button and Power button for 20 seconds.


5. When you are in recovery mode, select “Update from SD Card”.
6. Now select Update.zip (the zip file you downloaded in step 1) and execute it by pressing the home button.
7. Now your phone will be rooted after which you can select the reboot option.
8. After this, your phone is rooted. I recommend you to download BusyBox from the Android Market after you have rooted your phone.

Note:- It is working in my mobile 100% without any problem. I am not responsible for, if it is not working, damage your mobile and or any other issues.
Download Link
Download Link


Read more ...

Root Samsung Galaxy Ace Duos SCH-I589

Tutorial to root samsung galaxy Ace Duos SCH-I589. As you know what rooting is it's all about gaining superuser right on your android devices to learn more about read what is rooting ? so lets cover main point of this post how to root galaxy ace duos SCH-I589. So to root this device here we are going to take help of an application called UnlockRoot.With the help of Unlock root you can easily root or unroot most of android devices starting from Android 2.1 till 4.0. with the help of this tool you can only root and unroot your device it does not support sim unlocking.

Requirements:
For using this application to root your device you will need pc having windoes xp/vista/windows 7 ,kies for required driver and unlockroot install it on your pc after downloading it and follow the instructions below to root it.

Disclaimer :
use at your own risk! Rooting your device will Void Warranty or may brick it.


Installation Instructions:
  • Install samsung kies from the cd provided with your phone or from samsung.com it will install required driver for your device and reeboot your pc 
  • Then Enable USB Debugging on your Galaxy Ace Duos by going to menu>>Settings>>Applications>>Development and check Enable USB Debugging.
  • Download UnlockRoot software on your PC from here.
  • Connect Your Galaxy Ace Duos SCH-i589 to your PC using USB Cable.
  • Extract unloockroot23.rar and run UnlockRoot.exe it will be installed on your PC.
  • Now run unlock root from Start>>All Programs>>Unlock Root if it does not runs automatically.
Root Samsung Galaxy Ace Duos SCH-I589 
  • Now Press the Root Button and select your device when prompted.
  • Wait till it finishes rooting your galaxy ace duos.
  • Select Yes when prompted to restart your device for the effects to take place.

That is all. You have rooted your Samsung Galaxy Ace Duos SCH-I589 smartphone. Upon successful reboot you shall notice a new superuser app available on your App Drawer.
Read more ...

Root and Unroot samsung galaxy y duos S6102

Tutorial to root and unroot samsung galaxy y duos S6102. This tutorial is for the user who have to root samsung galaxy y duos s6102 and not for samsung galaxy y s5360 if you want to root galaxy y s5360 then click here for tutorial. Thanks to Millan.SIS at xda for creating this package here i am only providing tutorial on how to use it.


Warning: 


Rooting will void warranty of your phone use at your own risk I will not be held responsible for what ever happens to your device.


Steps to Root Galaxy Y Duos S6102
  • Must backup your data first
  • Download the Rooting File from Here (update.zip) also availavle on xda
  • Copy update.zip file to the SD Card root directory
  • Turn Off your Device and boot in recovery mode by pressing the key Volume Up + Home Button + Power Button together. 
  • when your phone boots in recovery mode will see the Blue Color UI where you can't use Touchscreen. Instead use "Volume Up and Volume Down to move Up and Down". And "Home Button to Select". And "Power Button used to go Back"
  • Then select "Apply Update from SDCard" option and choose "update.zip". from sd card
  • Once Patching is completed successfully reboot your Phone by select "Reboot System Now".
  • If you find "SuperUser" in your app menu your phone successfully Rooted 

Steps to UnRoot Samsung Galaxy Y Duos s6102


If you want to unroot your phone then
Backup your data
Download the UnRooting File from here (unroot.zip)
Follow rest of the steps as above in root section
If you cant find "SuperUser" in your app menu your phone successfully UnRooted.
Read more ...

Disadvantages of Rooting an android Devices

What are the Disadvantages of Rooting an android Devices?
   As i have already described what is Rooting and what are advantages of rooting android Devices in my previous post so now lets take a look on the negative side of rooting an android Devices. As i have already told that by rooting your device you void manufacturer's warranty and a chance to brick your device and if your device gets brick attempting to root then you will have to purchase a new one because you have already void warranty.


Bricking
  Bricking  your device means damaging your phone software so badly that your phone can no longer function properly or fully function less.
Disadvantages of Rooting an android Devices

Security
 Rooting your device increases risk of installing malicious software's because there is no way to find what the application intends to do with that Superuser power. so if you have rooted your device it is important have antivirus to keep safe your devices could be a potential risk in the future. I’d recommend installing an Anti-Virus and Security App just to Android device.
 Last but not least always take care before installing unknown applications and read user's review 


Next we will cover how to Root , Unroot , Custom Rom's, etc on this blog
Read more ...

Advantages of Rooting an Android Devices

What are the Advantages of Rooting android Devices?
     As i have already described what is Rooting in my previous post so now lets take a look on the positive side of rooting an android Devices. As i have already told that by rooting you can achieve superuser right on your devices so now what can you do if you have super user right on your device there are lots of things i have tried my best to provide here some of them.
Install Custom Firmware (ROM's) on your rooted devices
  Custom Rom's are the modified version of firmware that are not officially lunched but are developed  by developers and lunched unofficially for use on a particular device to run your device. As the firmware of the device resides in Read only memory of the device so to install custom ROM it is necessary to root device. why it is necessary to install custom Rom say you have an android device running on older version of Android OS and the manufacturer of your device has stop providing official update so with the help of Custom ROM we can install latest version of Available Android OS on your Devices and get updated with new features. There are lots of Custom Rom available of different devices it is now up to you which suits best for your devices. The best place to get Custom Rom is Xda forum or just Google.

Advantages of Rooting an Android Devices
Custom Themes
 Rooting your device allows you the ability to fully customize look and feel of your device by installing custom theme on your device.


Kernel, speed, and battery:
Kernel is a layer of codes that handles communication between hardware and software many developers tweak the kernel to achieve better performance, battery life and etc so to install this type of things and apps that may increase performance allow gaming on low ended devices or running hd video on Qvga devices increasing speed of your processor etc  requires root.


Update your phone with latest version of OS
Custom rom's are released by developers Say a new version has been lunched but not available for your device officially till now but has been released unofficially by developers then you can enjoy it before it is released.

Backing up your device
    One of the most important features that most of the stock build version of devices lack is ability to back up your Data and app.but if your device is rooted it relay become simple to backup your data and app with help of apps like Titanium Backup, Astro etc but all of them require root.

Playing games:
 Now a days many low ended devices are lunched which lack true gpu but if your devices is rooted you can still play some hd games which are not officialy supported by low ended devices with the help of software like Chainfire 3D but it requires root.


There are much more here i have listed some common advantages of having rooted Android Devices


Disadvantages of Rooting an android Devices
Read more ...

What does Rooting on Android devices means

So lets first understand what the term Rooting stands for when it is related to android devices and why should root or not root your android device ? But before proceeding rooting your phone will lead to void manufacturer’s warranty of your phone and may "brick" your phone. So now what is bricking? Bricking your device means that the software of your phone have an error and your phone can no longer function properly and it become almost useless like brick, simply saying you damaged the software of your device. So i can not recommend any one to root their devices. Now it's up to you whether to root or not because every thing has its own advantage and disadvantage.

What does rooting stand for and where it comes from?

What is Rooting?

Rooting an android device means achieving superuser rights, so you can modify your android device software. By rooting your device you gain ability to install custom firmware (ROM's), plugins, increase battery life, and ability to install software that require super user rights.In simple terms Administrator rights. The term Rooting is equivalent to jail-breaking if it comes to iPhone.
It comes from:
In Unix/Linux the term root is used to describe a user who has all the rights or permission to change or modify all the files and programs or any software code of that particular device Operating system. This is called "superuser". but when you purchase a new phone your phone is locked by manufacturer and it is provided only with limited rights means guest privilege. It is right because every one using the phone is not an expert and he/she may damage his/her phone if unknowingly made some changes where it is not required and damage it beyond repair. On the other it helps manufacturer to support their device and provide update. But for a tech expert only having guest privilege is not sufficient because lots of useful features are locked.


Advantages of Rooting an android Devices

Disadvantages of Rooting an android Devices

Read more ...